
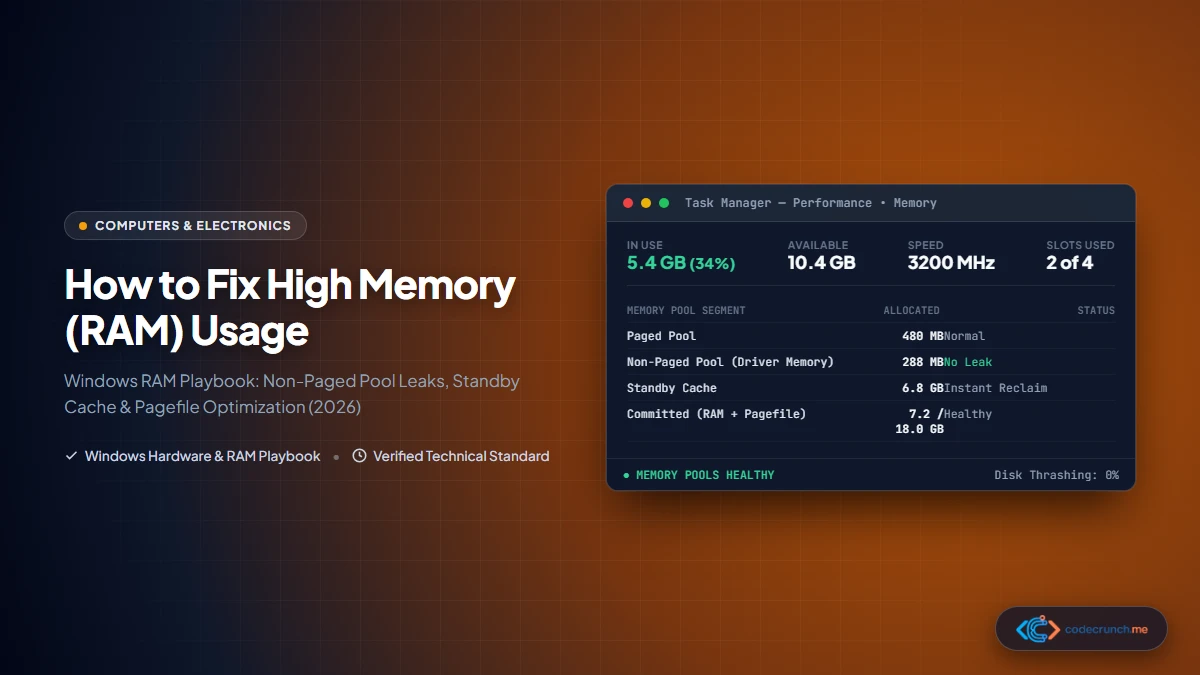
You boot up your Windows laptop or desktop, open only two or three browser tabs, and suddenly your system begins hitching: applications take ten seconds to respond, switching between windows stutters, and opening Task Manager reveals a alarming 85% to 98% Memory utilization lockup—even though no individual program appears to be using that much RAM.
When physical Random Access Memory (RAM) is exhausted, the operating system enters an emergency survival state called Disk Thrashing: it constantly shuffles active application data back and forth between fast physical RAM and slow secondary storage. Even on ultra-fast PCIe NVMe SSDs, disk swapping introduces severe latency micro-stutters. In our comprehensive hardware guide on how much RAM you actually need in 2026, physical memory capacity determines your system’s multitasking ceiling.
However, running out of RAM does not necessarily mean your computer lacks physical memory. In modern Windows 11 and 10 systems, memory exhaustion is predominantly caused by kernel-level non-paged pool memory leaks, misconfigured virtual memory pagefiles, rogue browser extension memory bloat, or aggressive background services. This diagnostic playbook walks you through the exact steps to locate hidden memory hogs and restore fluid multitasking performance.
- 1. The Architecture: In Use, Standby, Modified, and Free RAM
- 2. Why High RAM Usage Causes Severe Freezing: Disk Thrashing Explained
- 3. Step 1: Diagnosing Non-Paged Pool Memory Leaks (The Silent Killer)
- 4. Step 2: Fixing the Infamous Windows NDU Network Memory Leak
- 5. Step 3: Taming Modern Web Browsers (Memory Saver & Tab Discarding)
- 6. Step 4: Configuring Virtual Memory (pagefile.sys) Sizing Correctly
- 7. Step 5: Understanding & Clearing Standby Memory with RAMMap
- 8. Step 6: Auditing SysMain (Superfetch) & Windows Search
- 9. Step 7: Testing Physical RAM Modules for Hardware Defects
- 10. Step 8: When You Actually Need to Upgrade Physical RAM
- 11. Frequently Asked Questions (FAQ)
1. The Architecture: In Use, Standby, Modified, and Free RAM
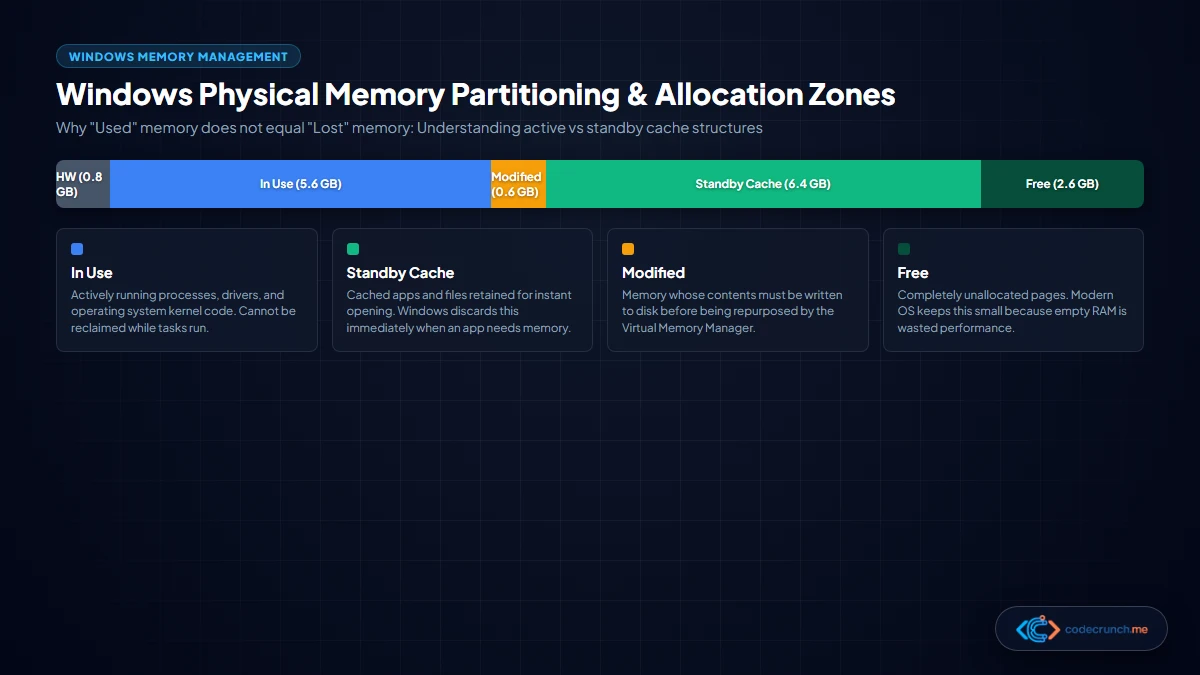
The single greatest misunderstanding among computer users is the belief that “free RAM is good RAM.” In modern operating systems, unused memory is completely wasted silicon. Windows purposefully utilizes spare RAM to cache recently launched applications, file assets, and libraries so they open instantaneously when requested.
To inspect your true memory distribution, open Task Manager (Ctrl + Shift + Esc), navigate to Performance > Memory, and look at the bottom segmented bar:
| Memory Allocation Zone | What It Contains | Can Windows Reclaim It Automatically? |
|---|---|---|
| In Use (Active Working Set) | Active code, data, and heap allocations for running applications and OS kernel. | No. Must stay in RAM while the program executes. |
| Standby (Cache) | Previously used files and programs kept in memory for instant re-opening. | Yes, instantly. Discarded the exact millisecond an active app needs RAM. |
| Modified | Data modified in RAM that must be written to disk before memory can be repurposed. | Temporarily locked until flushed to secondary storage. |
| Free | Completely unallocated, zeroed memory blocks. | Available immediately. |
| Non-Paged Pool | Kernel driver allocations that must never be swapped to disk. | Locked indefinitely until the allocating driver releases it. |
As documented by Microsoft Sysinternals RAMMap, Standby memory is classified as available memory. If your Task Manager shows 12 GB In Use and 4 GB Standby on a 16 GB PC, you have plenty of operational headroom. The real emergency occurs when In Use climbs above 90% without heavy software open.
2. Why High RAM Usage Causes Severe Freezing: Disk Thrashing Explained
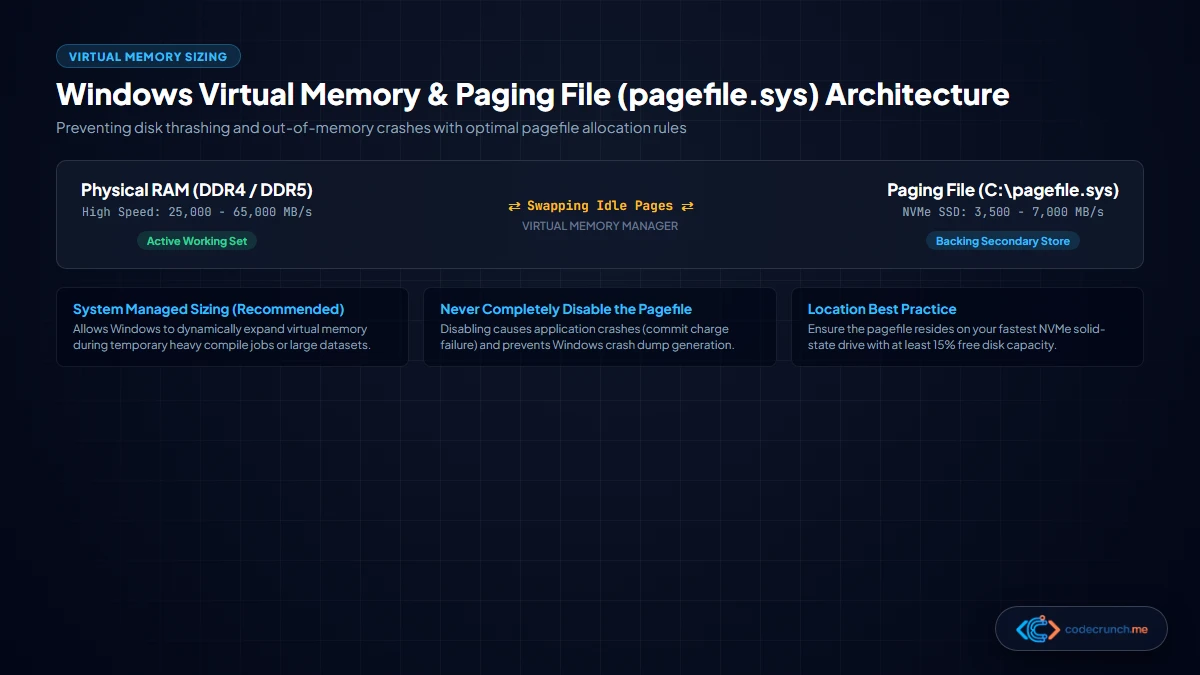
When the In-Use memory approaches 100%, Windows has no free or standby pages left to allocate to active processes. To prevent system-wide software crashes, the Virtual Memory Manager (VMM) takes memory pages belonging to background apps and forcibly writes them out to your primary drive in a hidden file named C:\pagefile.sys.
When you click back into that background application, Windows must pause execution, retrieve those memory pages from your disk, and write other pages to disk to make room. This continuous, desperate swapping loop is known as Disk Thrashing.
Because physical DDR4 and DDR5 RAM transfer data at 25,000 to 65,000 MB/s with 50-nanosecond access latency, whereas even high-end PCIe Gen 4 NVMe SSDs operate at 5,000 MB/s with microsecond latency, swapping causes CPU execution queues to stall. In our companion tutorial on SSD vs NVMe performance benchmarks, drive latency differences become painful during memory paging.
3. Step 1: Diagnosing Non-Paged Pool Memory Leaks (The Silent Killer)
If you sum up the memory usage of every application listed in Task Manager’s Processes tab and the total only equals 4 GB, but the Performance tab reports 15 GB In Use, you are experiencing a Kernel Memory Leak.
Applications execute in User Mode; if an app has a memory leak, it is visibly accounted for under its process name. But device drivers execute in Kernel Mode. Drivers request memory from the operating system’s Paged Pool or Non-Paged Pool. If a buggy driver allocates memory and forgets to free it when finished, that memory remains locked forever—and Task Manager does not assign it to any visible process!

Look at the bottom-right corner of Task Manager > Performance > Memory:
- Healthy System: Non-paged pool typically sits between 200 MB and 500 MB.
- Leaking System: Non-paged pool climbs to 2 GB, 4 GB, or 10+ GB, continuously rising the longer your PC remains turned on.
4. Step 2: Fixing the Infamous Windows NDU Network Memory Leak
By far the most notorious non-paged pool leak in Windows 11 and 10 stems from the built-in Network Data Usage (NDU) monitoring driver (ndu.sys). When paired with certain Killer Network, Realtek, or Intel Wi-Fi and Ethernet adapters, NDU fails to release tracking buffers, rapidly consuming every gigabyte of available RAM within hours of uptime.
Disabling the NDU monitoring service does not harm internet connectivity, network speeds, or Windows Update; it simply prevents Windows from logging individual app data usage in Settings:
- Press Win + R, type
regedit, and press Enter to launch the Registry Editor. - Navigate to the following key path:
HKEY_LOCAL_MACHINE\SYSTEM\CurrentControlSet\Services\Ndu - In the right pane, double-click the
StartDWORD value. - Change the value data from
2(Automatic) to4(Disabled). - Click OK, close the Registry Editor, and reboot your computer.
Upon reboot, inspect Task Manager: on systems afflicted by the NDU bug, non-paged pool usage will instantly plummet back to a healthy 250 MB, permanently restoring gigabytes of locked physical memory.
5. Step 3: Taming Modern Web Browsers (Memory Saver & Tab Discarding)
Web browsers are no longer simple document viewers; they are complex operating systems executing thousands of asynchronous JavaScript threads, WebGL canvases, and multimedia streams. A single modern browser session with 30 open tabs can easily consume 6 to 10 GB of RAM.
Fortunately, modern Chromium engines (Google Chrome, Microsoft Edge, and Brave) include aggressive memory optimization mechanisms:
- Enable Native Memory Saver: In Google Chrome, navigate to
chrome://settings/performanceand toggle Memory Saver to ON. Select Balanced or Maximum. In Microsoft Edge, openedge://settings/systemand enable Sleeping Tabs with a 5-minute inactivity timer. - Audit Browser Task Manager: Press Shift + Esc while inside Chrome or Edge. This launches the internal browser task manager, showing the exact memory footprint of each individual tab and extension. Locate rogue ad blockers or poorly coded extensions consuming 1+ GB of memory and remove them.
- Disable Hardware Acceleration Overlaps: If you frequently experience black screens or GPU memory spillover into system RAM, toggle Hardware Acceleration off and on to clear stale Direct3D buffers.
6. Step 4: Configuring Virtual Memory (pagefile.sys) Sizing Correctly
A widespread and dangerous piece of bad advice circulating on internet forums advises users to “completely disable the Windows paging file to speed up your SSD.”
Never disable the Windows pagefile. Doing so introduces immediate catastrophic instability. Many critical software architectures (including Photoshop, game engines, and developer compilers) request Commit Charge reservations from the OS. If no backing store exists, applications crash with out-of-memory exceptions even if physical RAM appears to have free space.
To ensure optimal virtual memory configuration without consuming excessive SSD space:
- Press Win + R, type
sysdm.cpl, and press Enter to open System Properties. - Switch to the Advanced tab. Under Performance, click Settings.
- In Performance Options, switch to the Advanced tab and click Change under Virtual memory.
- Ensure Automatically manage paging file size for all drives is checked (recommended for 90% of users).
- If you must configure a custom size to prevent drive filling, set Initial size to 2048 MB and Maximum size to 300% of your physical RAM (e.g. 12288 MB for a 16 GB PC), hosted exclusively on your fastest NVMe solid-state drive.
7. Step 5: Understanding & Clearing Standby Memory with RAMMap
While Windows is designed to release Standby memory automatically when applications request it, certain legacy games, video editors, and machine learning scripts fail to trigger the release mechanism properly, causing stutters when Standby cache consumes 95% of memory.
To inspect and clear Standby cache on demand:
- Download the official, standalone Microsoft utility RAMMap from Microsoft Sysinternals.
- Right-click
RAMMap.exeand select Run as administrator. - Switch to the Use Counts tab to observe active physical pages mapped to Standby.
- Click the Empty menu item at the top and select Empty Standby List.
- Immediately, several gigabytes of Standby memory are transitioned to Free RAM without terminating a single running application!
8. Step 6: Auditing SysMain (Superfetch) & Windows Search
SysMain (formerly called Superfetch) is the background Windows service responsible for monitoring which applications you use most frequently and preloading their binaries into Standby RAM during idle time.
On modern PCs equipped with high-speed PCIe Gen 4 and Gen 5 NVMe solid-state drives, preloading applications into RAM offers negligible speed gains because NVMe read speeds already exceed 5,000 MB/s. If SysMain causes continuous disk activity and RAM bloat, you can safely disable it:
# Launch PowerShell as Administrator

# Check current SysMain service status
Get-Service -Name SysMain

# Stop and disable SysMain service from running at startup
Stop-Service -Name SysMain
Set-Service -Name SysMain -StartupType Disabled
9. Step 7: Testing Physical RAM Modules for Hardware Defects
Sometimes, high memory pressure or unexplainable system freezing is triggered by hardware faults: corrupted memory cells on physical DDR4 or DDR5 sticks cause read errors, forcing Windows to repeatedly reload data into secondary memory banks.
Before purchasing replacement hardware, run the native Windows Memory Diagnostic tool:
- Press Win + R, type
mdsched.exe, and press Enter. - Select Restart now and check for problems (recommended).
- Your PC will reboot into a blue diagnostic screen running a 2-pass hardware test. If defective silicon address lines are detected, error codes will appear.
- If errors occur, open your desktop chassis or laptop underside, remove the RAM sticks, clean the gold contact pins with isopropyl alcohol, and reseat the modules firmly into slots 2 and 4 (for dual-channel desktop configurations).
10. Step 8: When You Actually Need to Upgrade Physical RAM
If you have implemented all diagnostic steps above, verified zero driver memory leaks, enabled browser sleeping tabs, and your In-Use memory still consistently exceeds 90% during everyday productivity, your computing workflow has simply outgrown your physical hardware capacity.
| Installed RAM | 2026 Adequacy Status | Recommended Workloads | Upgrade Recommendation |
|---|---|---|---|
| 4 GB – 8 GB | Severely Outdated | Basic single-tab web browsing & light text editing. | Immediate Upgrade Required: Upgrade to minimum 16 GB for modern Windows 11. |
| 16 GB | Mainstream Standard | General office productivity, 1080p gaming, casual coding. | Adequate for everyday users; monitor usage during heavy creative editing. |
| 32 GB | Power User Sweet Spot | Software engineering, Docker containers, 4K video editing, AAA gaming. | Ideal long-term capacity for technical professionals. |
| 64 GB+ | Workstation Tier | Virtualization clusters, local AI / LLM inference, 3D VFX rendering. | Specialized engineering and data science workloads. |
When purchasing new memory modules, always verify motherboard form factor (SODIMM for laptops vs DIMM for desktops) and match speeds and latencies as detailed in our laptop hardware buying checklist.
11. Frequently Asked Questions (FAQ)
Why does Windows use 4 GB of RAM with no programs open?
Windows 11 requires approximately 3.0 to 4.0 GB of memory for core operating system tasks: the NT kernel, Desktop Window Manager (dwm.exe), Windows Defender antivirus engine, audio subsystem, and hardware device drivers. This baseline overhead is completely normal on 16 GB and 32 GB systems.
Does disabling startup programs really save RAM?
Yes, significantly. Background utilities like Discord, Spotify, Steam, cloud storage clients, and printer helpers remain resident in physical RAM 24/7. Disabling 8 to 10 non-essential startup apps typically reclaims 1.5 to 3.0 GB of precious memory.
Will adding more RAM speed up my computer?
Adding more RAM will dramatically speed up your computer only if your current RAM is exceeding 85% utilization and triggering disk thrashing. If your system is currently utilizing 6 GB out of 16 GB, upgrading to 32 GB will produce zero noticeable performance difference for everyday tasks.
Can memory leaks damage physical RAM hardware?
No. Memory leaks are purely software errors where a program forgets to release pointers to allocated RAM. They cause temporary system slowdowns and application crashes, but they cannot physically damage memory chips or motherboard silicon. Rebooting your computer completely resets memory allocations.